
An Inexpensive, Ergonomic Home Office:
Finding an affordable standing desk is hard — but it’s even more difficult if you’re 6 feet tall and cheap like me, with limited space at home. I knew I had to find an ergonomic home office set-up, however, since I’m an educator doing remote teaching from home every day this year for too many hours to be hunched over.

I began investigating online. During my weeks of searching for a cheap sit-stand desk, however, everything I found was over $200 and massive. Not useful! Not what I wanted! Thus, I began scheming how to make my own ergonomic home office set-up creatively.
Read on to see the standing desk solution I found. The links here are affiliates which provide a small commission without extra cost to you if you choose to purchase through them, but whether or not you use my specific suggestions, I hope the concept is useful.
Materials for a DIY Sit-Stand Desk:
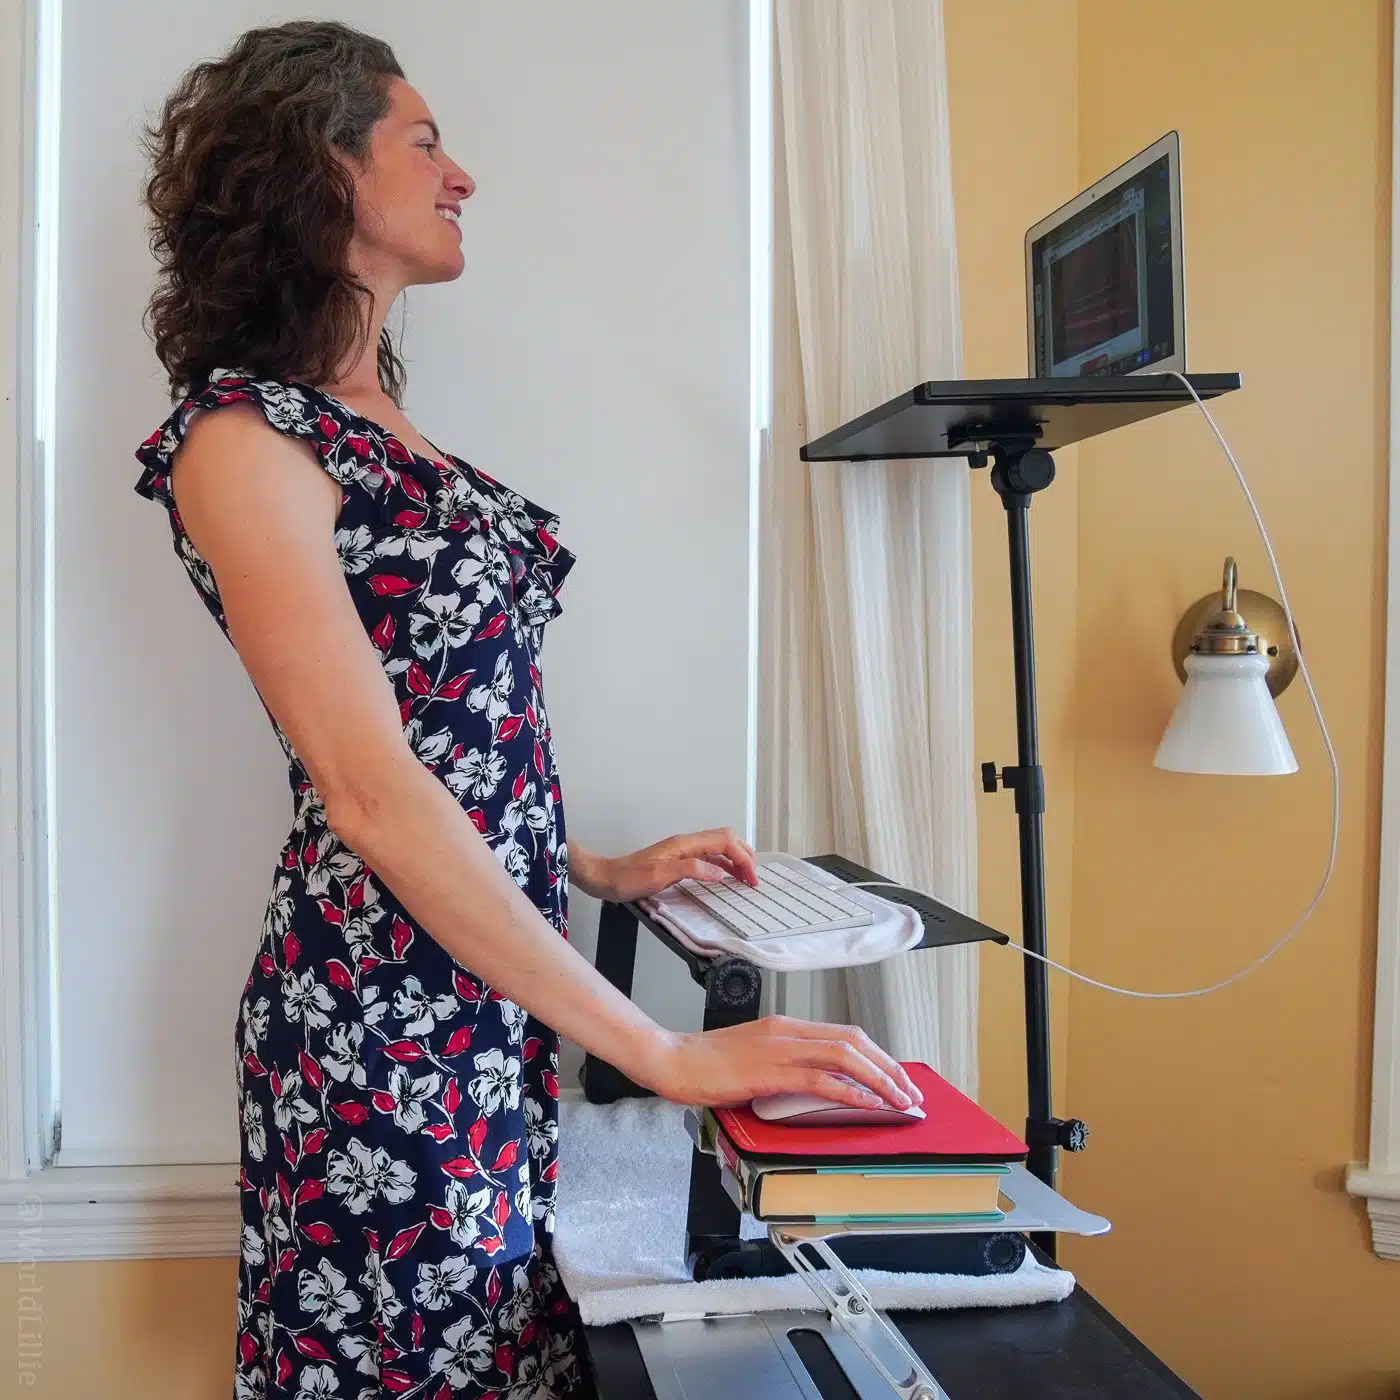
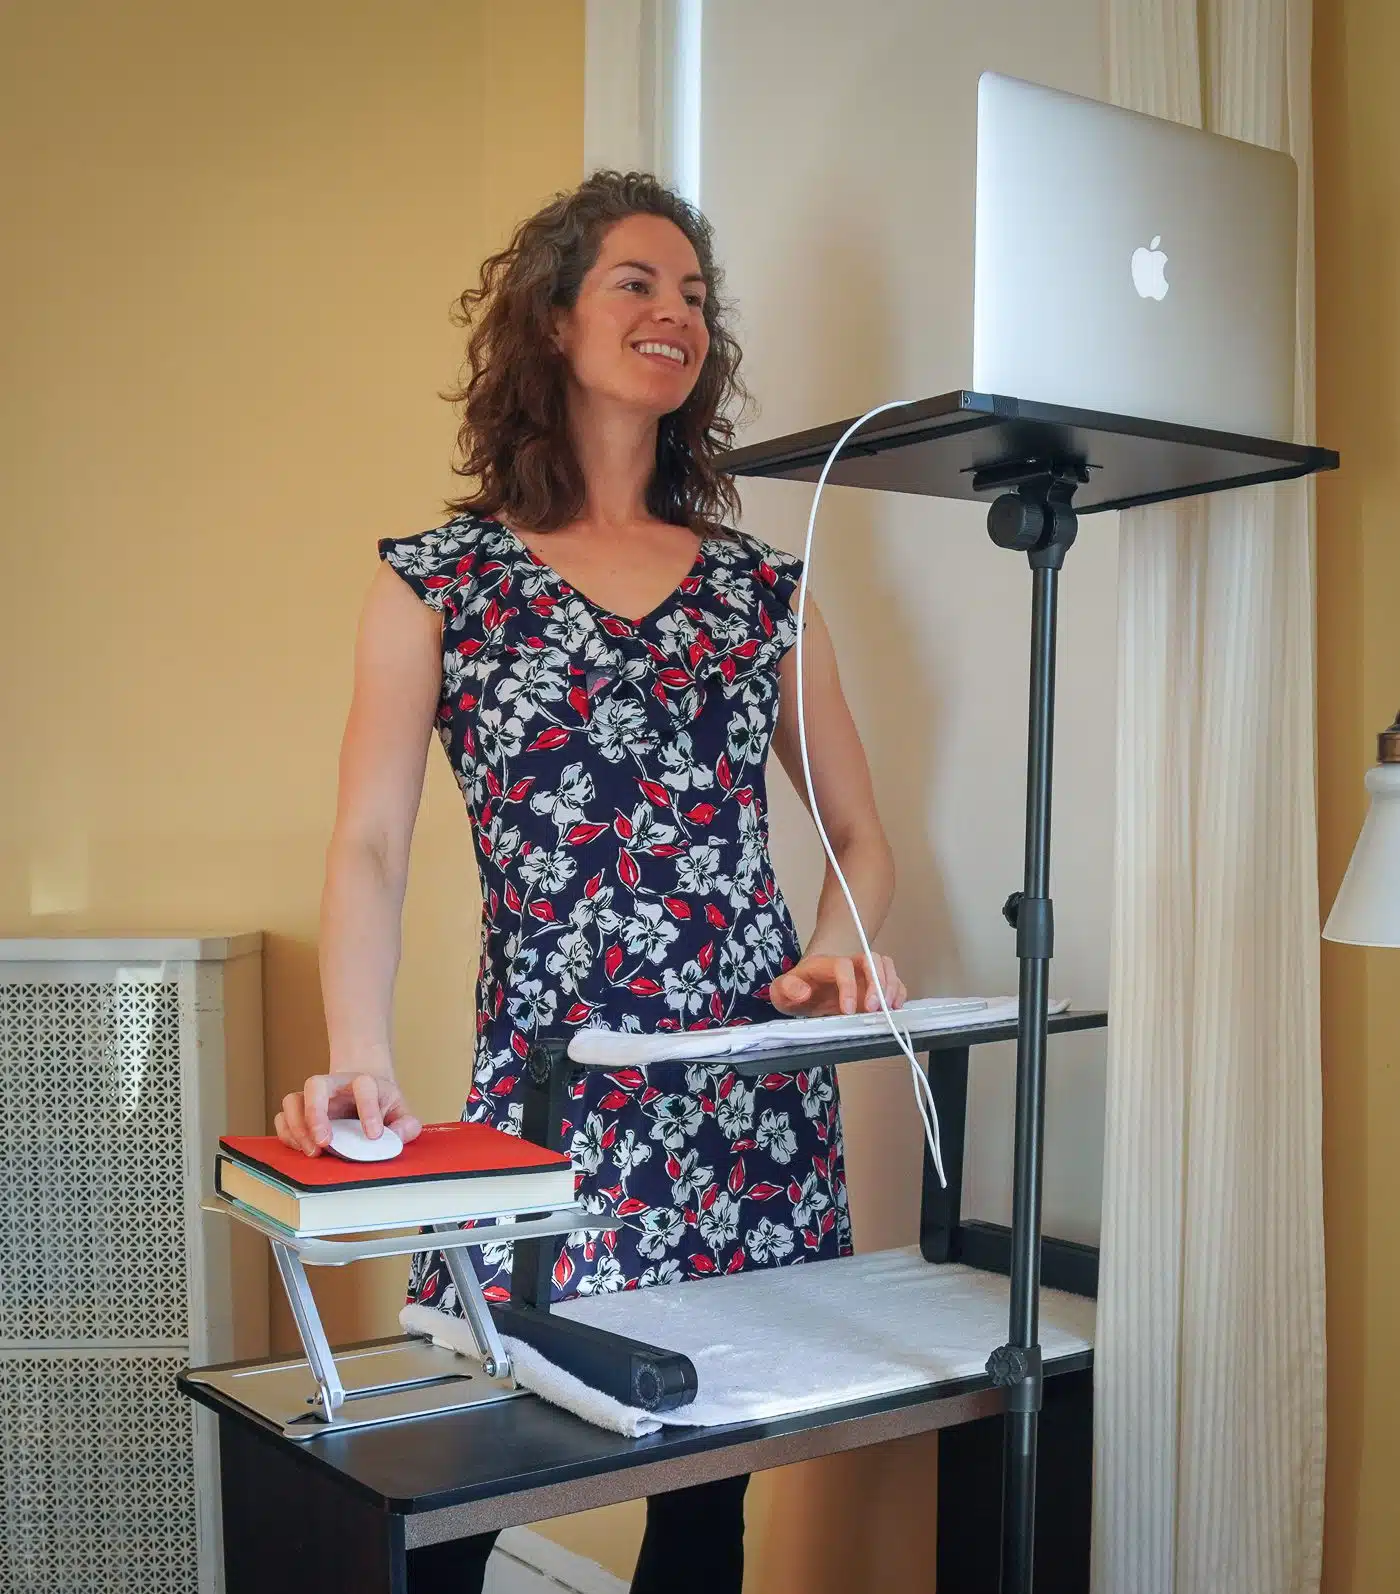
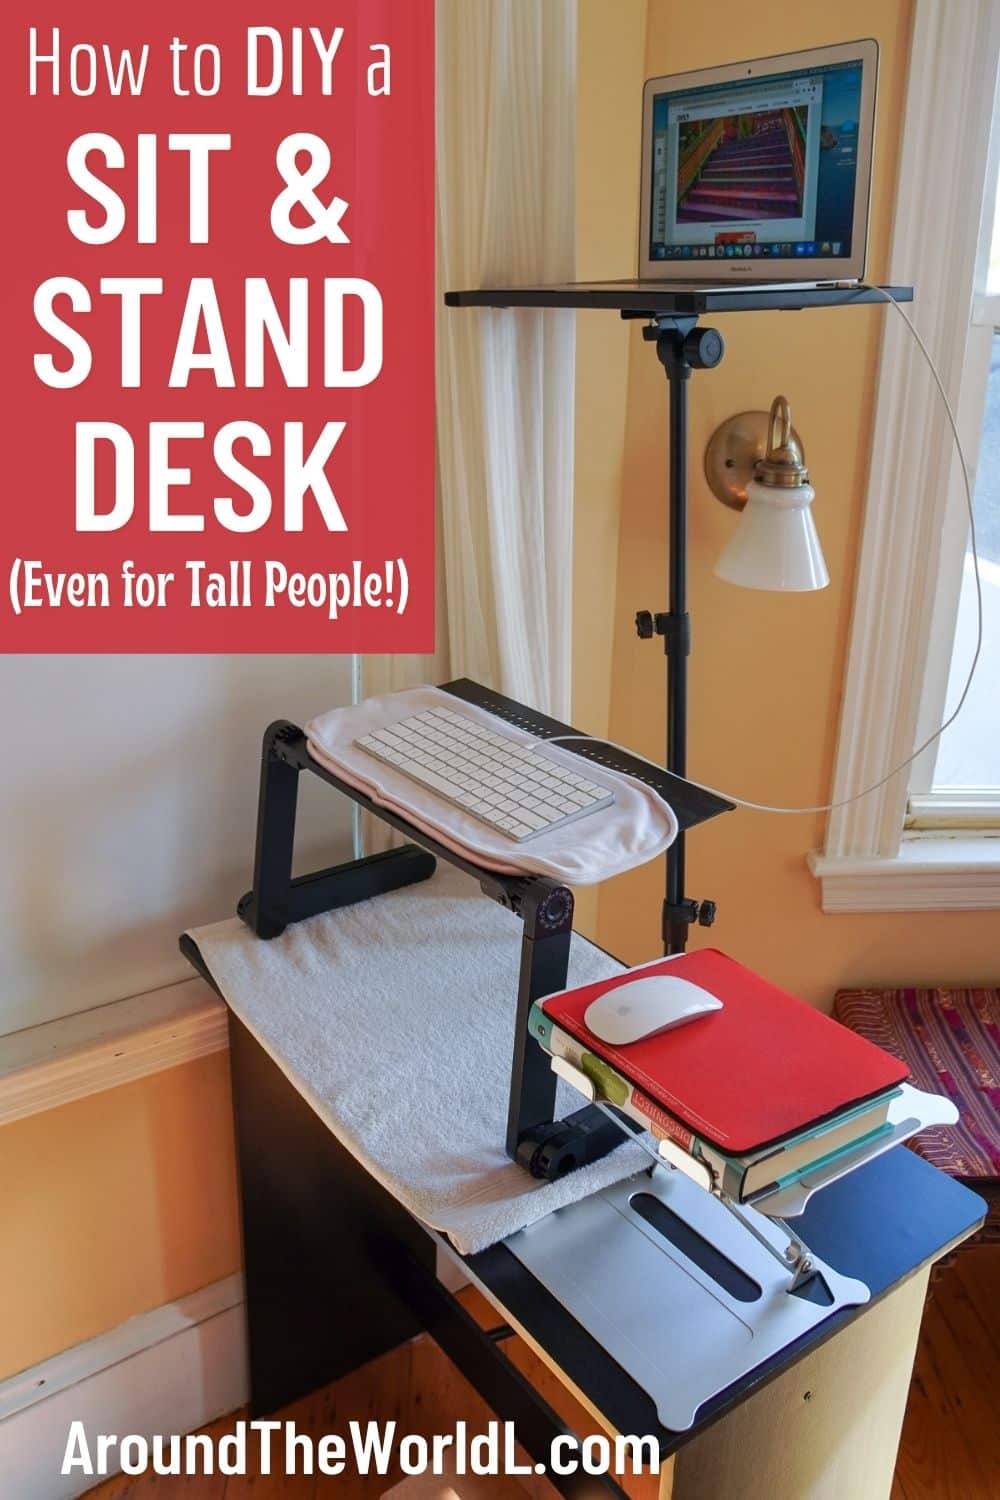
1. The most important material is a DJ stand. “A WHAT?!” you ask. No, we are not about to spin sweet beats. Rather, this adjustable metal stand was THE revelation I’d been missing for an ergonomic home office — especially for tall people.
This tiny, tall table is where your laptop will go. I purchased this DJ stand and it does the job well (hasn’t tipped over at all) despite me raising it up and down every day for weeks now.
2. You need a regular sitting desk or small table, but it doesn’t need to be fancy. I used this ultra-cheap, tiny wooden desk which does the job, though it’s a little on the wobbly side. (I didn’t expect much for $28!)
3. You will need a detachable keyboard and mouse to connect to the laptop, plus a mouse pad. I recommend a wired keyboard and a wireless mouse because the keyboard is more prone to glitching when not wired, but the mouse should be ok, and one set of wires is easier to navigate than two.
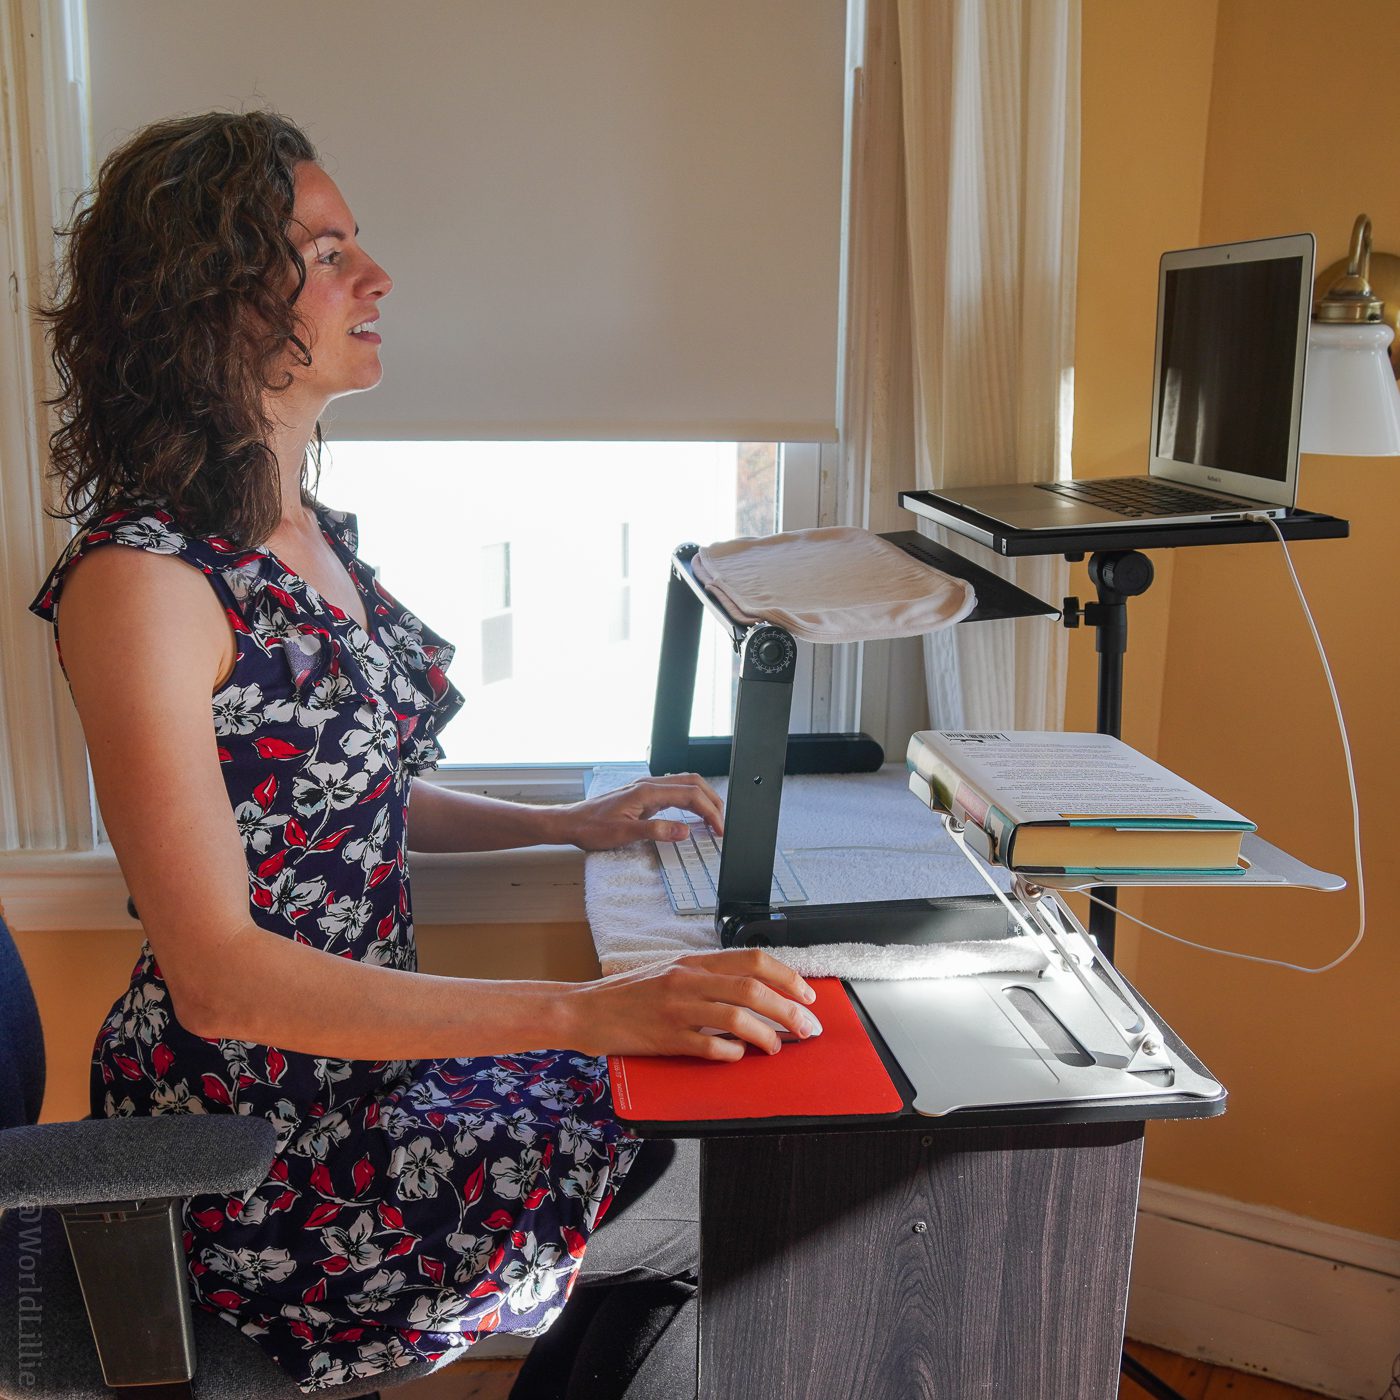
4. Next, you need a keyboard stand with space under it. The one I have looks like this (though it isn’t that exact model). The reason you need space under it is so you can place the keyboard on top of the shelf when standing, and underneath when sitting.
5. A stand for the mouse pad and mouse is the next ingredient, so your hand is raised for standing use. I use this metal stand which is sturdy and adjustable, and I added a hardcover book on top so the pad doesn’t fall through the holes. When I sit, I push the contraption back on my desk so there’s room in front to put the mouse directly on the table. You could also probably use a stack of books for this mouse riser, but then you can’t get the angle that the stand allows.
Note: If you click the links in #4 and #5, you will see that both materials are technically laptop stands, however I am using them for the external keyboard and mouse, not the laptop, because that allows for better distancing for the screen. Financially, you could probably save money by buying a stand big enough to hold both the keyboard and mouse, but there’s something I like about having them separate and thus 100% adjustable independent from each other.
6. Naturally, you’ll want a desk chair for the “sit” part of the sit-stand desk. I use a secondhand office chair (probably from the 1980s!) with pillows and towels to make it more comfortable. It’s on wheels so I can push it away to stand. Because I have wood floors, I have a plastic floor protector (NOT the kind with spikes — I want to protect my floors!).
7. Don’t want to invest in expensive ergonomic wrist pads? Towels, rags, and baby burp cloths have been my solution. They have been especially important because my cheap desk has sharp edges that need cushioning. (Funny how much use I’ve gotten out of burp cloths this many years after our kids being infants! See another use for burp cloths here in the fitness realm: as workout sliders!)
8. To DIY a foot rest, consider yoga blocks like these. I’ve found them ideal for adjusting my legs, especially because my cheapo desk doesn’t have a huge amount of leg room for my tall self, and I don’t want to accidentally kick over the DJ stand.

Why This DIY Sit-Stand Desk is Better for a Tall Person:
At this point, you may be doing the math and saying, “Hey, when I add up all those parts, they almost hit $200! Why don’t I just buy a fancy pre-made sit-stand desk?”
Here’s the reason: Most sit-stand desks are not adjustable enough, and are too big. This entire DIY set-up takes up just a few square feet, and is immensely modifiable, in every way your little heart (or tall body) desires.
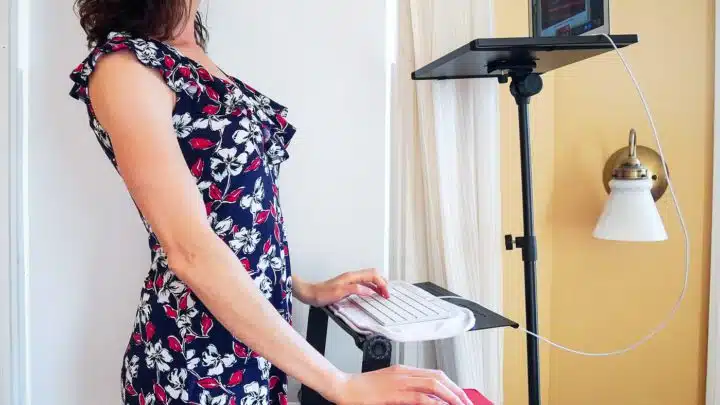
Most importantly, I can raise the DJ stand much higher than a standing desk would ever allow. I have never found a traditional standing desk that goes almost 6 feet up, which is the height I need to for Zoom eye contact — but this DJ stand does!
And what about focal point distance? Because it’s not attached to the desk, I can move the DJ stand way back or forward, depending on how “zoomed-in” I want to be in the frame when I’m teaching. (See this fascinating Edsurge article about why it’s better to have your shoulders and upper torso in the frame to combat “Zoom fatigue.”) Having the monitor further back helps immensely with eye strain, too.
Finally, this whole sit-stand desk setup (minus the table and chair) folds up for easy transport! Want to work ergonomically from a hotel room during a weekend getaway? Pop the DJ stand into its small carrying case and be on your way.
Disclaimer: Watch Out for This
The biggest thing to keep in mind with a DIY sit-stand desk: You need to be MUCH more careful than with a traditional expensive set-up to not knock over your expensive equipment.
Yes, my DJ stand has not tipped over yet (knock on wood), but I always have an eye on the stand and my rickety inexpensive desk to make sure they don’t topple, and I don’t accidentally kick then over.

Other Ways to DIY a Standing Desk
Don’t want to get all this equipment, but still need an ergonomic standing desk? A friend swears by this ultra-inexpensive method: Put the laptop on top of a tall bureau, then pull out one of the drawers and put boxes, blocks, or book stacks inside — and the place an external keyboard and mouse on top! Presto.
Other DIY standing desk methods usually involve complex combinations of tables, shelves, boxes, book stacks, and pillows. If you find a contraption or set-up that works for you, great! I am a fan of the DJ-stand method, however, because it’s so customizable, and seems more professional. (Call me picky, but I have trouble feeling professional when hovering over a sock drawer.)
Thoughts on This DIY Sit-Stand Desk?
So what about you? If you tried this DJ stand set-up, how did it go? Have you found other configurations of tables and risers that work for you? What movement breaks keep you from getting stiff, whether sitting or standing? Do you have questions or suggestions about how to make the most ergonomic home office possible? Do share!

DIY Standing Desk
How to DIY a sit stand desk which is compact, affordable, adjustable, and even high enough for a tall person! (At 6 feet tall, finding an ergonomic standing desk that helped eliminate back pain was a challenge.)
Materials
- DJ Stand
- Keyboard shelf (with space underneath)
- Mouse stand (small and adjustable)
- Compact desk
- Hand towels or burp cloths
- Laptop, keyboard (wire connection recommended), and wireless mouse with mouse pad.
- Extension cords (optional, depending on where outlets are).
Tools
- Screwdriver (if building desk)
- Cleaning products
Instructions
- Gather the materials.
- Build or find the desk. If it has rough edges, place a towel or cloth over it.
- Set the keyboard stand on top of the desk, and the keyboard on top of that.
- Build the DJ stand and set it behind the desk. Connect the keyboard to the laptop.
- Set up the mouse platform, pad, and mouse. Viola!
- To change to SITTING DESK position, adjust the DJ stand to almost touch the keyboard stand. Take the keyboard off the stand and place it under the shelf. Push the mouse stand to the back of the desk and place the mouse and pad on the desk. Roll the chair back in, and you're all set. Enjoy!
Notes
See the previous attached article for additional details and product recommendations.


The author, Lillie Marshall, is a 6-foot-tall National Board Certified Teacher of English, fitness fan, and mother of two who has been a public school educator since 2003. She launched Around the World “L” Travel and Life Blog in 2009, and over 4.2 million readers have now visited this site. Lillie also runs TeachingTraveling.com and DrawingsOf.com. Subscribe to her monthly newsletter, and follow @WorldLillie on social media!
Brianna
Wednesday 18th of November 2020
I see so many neck and shoulder pain issues stemming from bad home office ergonomics, this is such a great solution!
Lillie Marshall
Thursday 19th of November 2020
Ah right -- I forgot you do physical therapy! Yes, my neck was hurting so much from my previous "sitting at the dining room table" home office.
Genevieve | Fitty Foodlicious
Wednesday 18th of November 2020
I built my own standing desk too. I love that I can switch between sitting and standing. It's so good for circulation too and yours look awesome and easy to set up!
Lillie Marshall
Wednesday 18th of November 2020
Love it! I'm curious how your DIY home office setup compares!
Jessica
Tuesday 17th of November 2020
What a great solution! I sure wish I could use this setup at work. Sitting all day is so hard on my body.
Lillie Marshall
Tuesday 17th of November 2020
You make a good point that a work from home (WFH) office set-up often has more flexibility than a "real office" since you provide your own furniture!
Soheila Hakimi
Tuesday 17th of November 2020
wow that's pretty clever! I have been starting to get lower back pain from my dinning room chair and will have to try and find a comfortable way to make my desk a standing one like you!
Lillie Marshall
Tuesday 17th of November 2020
Good luck! I do recommend investing in at least a secondhand real desk chair. I found my kitchen chair caused all sorts of back pain for the weeks I used it.
Michelle Frank
Tuesday 17th of November 2020
I have been looking for an economic ergonomic solution just like this, so your article is so timely! And I love the ideas about burp cloths—genius!
Lillie Marshall
Tuesday 17th of November 2020
Hehe -- glad you enjoyed it, and hope it helps! Of course, you can just use hand towels for the wrist cushioning while typing, too... but those don't have dinosaur patterns!